Wednesday, October 30, 2013

Easy Zombie Makeup...NO PROSTHETICS!!


Ok so I decided to play today and had all kinds of fun doing this simple zombie makeup! I started with a few coats of Liquid Latex and Zombie Flesh latex. These are cheap as hell at the Halloween store this time of year. (No more than $8 a bottle.)
I used like 3 coats of Liquid latex then 2 coats of the Flesh. Make sure you let it dry between each coat. (You can use a blow dry to speed up the process :)
I added this over my entire cheek with a cosmetic sponge...
When dry it is time to add your base. Now you can use the cheap Halloween grease paint tube but in all honestly I hate those things. They just never smooth out right. So this year MAC put out an amazing Halloween line!! I used the Face & Body in White and the set powder in Invisible. Now if you are just going light for Halloween these will break the bank but for my creepy self and knowing I will use them all year they where perfect. Check out the entire Rick Baker line at MAC.
 I used a foundation brush to apply.
Next take a small brush or toothpick and carefully pull out the scratch marks in the latex.
For this part I used just a bunch of cheap Halloween supplies you can find at any Halloween store.
Using a flat eyeliner brush paint the black along one side of the scratch
 Using a small shadow brush (I grabbed some at the dollar store as to not ruin my good brushes) Paint the Vampire blood opposite the black in your scratch.
Now this is probably the most important item in the makeup and from this point on the realism is just achieved through layering & Blending.
The Gel blood needs to be heated before use. Submerge in a water bath and heat up in the microwave for about a minute. Apply over the entire scratch area quickly. (Mine came with a little mini popsicle  type stick and this was perfect for application.)
Now as this dries it will get a bit of a gummy type texture.
Reapply a slight bit of the black paint to the same side as before.  Then apply the bright red paint as a highlight opposite the black.
Dab your brush along the scratch so you don't have just a straight line.
Apply another layer of the gel blood (This does harden fast so you may need to heat it up again.)
Next I mixed a tiny bit of the black paint with the vampire blood. I used a flat eyeliner brush to bring the scratches to more of a point. (Probably not the best way to do this but hey it worked)
Next I took a "Bruise" Colored eyeshadow....I am super obsessed with this Jane Eye Zing Plum Perfect shadow cause it is just the perfect color...(I even used it for my Hubby's Mad Hatter makeup this year cause he HATES wearing makeup LOL). I used the eyeliner brush to follow on side of the scratch to make it look bruised.
Done with the scratches I moved on to the rest of the makeup.

I used a sponge eyeshadow applicator (I know shocker since I hate the things but I wanted no chance of shadow falling) To ring all the way around my eyelids and under my eyes.
Then I followed the black with a bright deep purple color....(Both colors are just from my 120 color palette from BH Cosmetics)
And completed to my brow for the sunken look with the Jane Plum Perfect....
I added Urban Decay 24/7 Glide on liner to my waterline and Cailyn gel liner in black to my upper lash line. I finished my eyes with MAC Haute & Naughty Mascara.
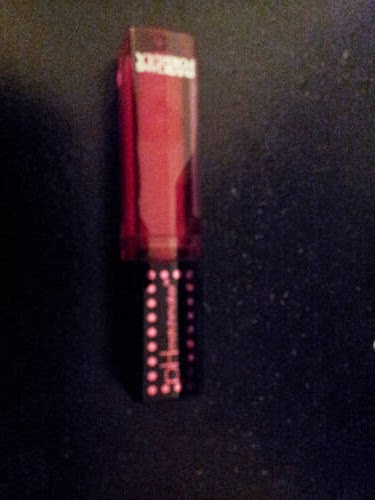
The lipstick is Night Sky & Cathedral from Morgana's Crypt. She has all kinds of amazing products in all colors! Night Sky is no longer available (It was a black shade) But the Cathedral really is a stunning purple Grey and looks amazing on it's own as well.
FYI...For the Freshly crawled out of the grave hair it is super simple! Mess your hair a bit and add in some baby powder near the top. No real need to brush it through but you may want to fluff or shake your hair to get rid of excess.

And of course add a retarded amount of blood cause what's a zombie without blood.
 
I would love to see how your results came out! Feel free to email me any looks :P

Tuesday, October 15, 2013

So just feeling kinda girly today and I wanted to share my look. I got this lipgloss awhile ago and it is just super cool. Today I used Lancome Teint Miracle foundation in Ivorie 2c, Benefit Flawless powder in Love Me Ivory, Bombshell Blush, Urban Decay Prime Potion, Altered Ego Cosmetics mineral eyeshadows (Her Esty has closed but you can still get some shadows on her facebook, Urban Decay 24/7 Glide on liner in Ransom, Dior Show Extase Mascara, & Physician's Formula PH Matchmaker Lipgloss in pink. This lipgloss is super awesome!! It adjusts to your PH so the color is perfect every time! Plus there is a little mirror and the wand lights up so that you can see no matter where you are trying to touch up!


Monday, October 14, 2013

Ipsy bag September 2013

This month's Ipsy bag was perfect for a natural look or a dramatic look. It had a card sample of the Career Palette, NYX Shadow in Morroco, Starlooks Pencil in Obsidian, It's So Big Mascara by Elizabeth Mott,Cailyn tinted Lip Balm in Big Apple, & Butter London polish in LA Moss.

Look # 1 is more of a natural look. I used The Career Palette Sample card along with the Starlooks eyeliner & It's So Big mascara. I Also used Lancome Teint Miracle Foundation in Ivoire 2c, Benefit Flawless powder in Love Me Ivory, Urban Decay Primer Potion, Urban Decay shadow in Polyester Bride, & Elizabeth Arden Luminous Lip Gloss in Precious Petal.


Next is a little more dramatic...I used The NYX Shadow in Morocco, Starlooks Pencil in Obsidian, It's So Big Mascara, & The Cailyn Lip Balm. I Also used The Kat Von D True Romance Love & Fury Shadow palette in colors Glock, Holy Bible, & Albino. And since the lip balm was a little bright for me I added Elizabeth Arden Luminous Lip Gloss in Precious Petal over it.


And saving the best for last...I LOVE this Butter London in LA Moss. It is a stunning wine color!


Wednesday, October 9, 2013

Julep October It Girl Box....

Ok so I know I am not the first person to say this and I know I wont be the last but this month's service with Julep was not good. I never got my email telling me my selection window was open like most. However I checked a few times and never found my selection window open either. Of course since I never responded to the selections I got sent the box and had no option of add ons. Now I will be the first to admit I do tend to skip my box quite a bit and I rarely purchase add ons but this month is always an exception. I always love the colors from October boxes being the little gothy girl I am. I love my box but I would have loved to add on so many other things. Casper glowed in the dark and that would have been a must have for me. Cleopatra had a latex finish...Ummm yea....That would have been perfect for all my PVC outfits. And Beatrix...I love any glitter that has black in it! 

All that said and disappointment on everything I missed out on aside I really did love the colors in this box. And I love the little bonus Candy Corn! Just perfect for the season!

So this month's box included...
Missy- This is a awesome polish that looks just like liquid silver. It has a great slight sand texture to it as well.
Ciara- Lemme tell you this polish is to die for! In the bottle I thought it looked kinda like a black with glitter but actually it is a stunning wine color with a beautiful blue shimmer!
Kendra-This color is fab as well. It is a perfect forest green color just packed with shimmer.
I really do love all the colors just wish I had the option to get more of this month's collection. 
All polishes are 2 coats with no base or top coat.


Julep It Girl Box August...

Hey there again. Trying to do a few catch up posts on some great Julep colors I have gotten over the last few months. This post is for The It Girl Box from August. All Swatches are coats coats with no base or top coat. Sorry about this being a crappy cell pic but it is all I have right now :(

From Left to right we have:
Fiore- This is a great deep brown color. Now I am not much for brown but this color is stunning. There is a very slight hint of like a wine color that highlights the color beautifully.
Lily- This WAS my absolute favorite of the set. It is a stunning dusty fuchsia color just perfect for summer. But notice I said was...After using the polish a few times for pedicures it sat in my polish box for a color weeks unopened max. And the damn polish settled and separated a bit. The polish still works fine but the color is no longer as dark as it was a quite a bit of the pigment is settled at the bottom of the bottle. So disappointing!
Marjorie- Now I am now much for wearing orange polish myself but it is a really nice color for someone who is. It has a really beautiful shimmer and in person it is not just another great pumpkin shade LOL.


Julep It Girl Box (December I Think...)

Ok so I know I suck with doing reviews of my Monthly boxes especially Julep. I can't wear polish to work anymore so I don't much get a chance to do my nails. So today I decided to sit down and swatch some of my past boxes that I havent gotten to dig into so you can see some of the beauties :)

Unfortunately I do have to apologize for the photo quality but my Camera is still on the fritz so these are cell phone pics. Man I really need to get that thing fixed or buy a new one :(

Anyway...
Left to right the colors are...
Vivien-This is a clear base with silver micro glitter and Medium size gold hexes.
Harper- This has a slightly teal base with Teal and sliver small glitters. It would take several coats to achieve full opacity but I am pretty sure it is possible.
Ivy- This is a stunning blue/Purple duochrome micro glitter in a blue base. Pretty sure at 3 coats your would achieve full opacity.

All polishes are 2 coats with no base or top coat.