Showing posts with label Sally hansen. Show all posts

Wednesday, July 9, 2014

Quick 4th of July mani...

Just a quick post to show of the 15 minute mani I did for 4th Of July...Didnt know I was going out so it was done right before we had to leave LOL. I used Sally Hansen polish called In The Navy, Essie Polish in Recessionista, The Stars I picked out only silver and gold stars from my Wet N Wild Blind Date polish, & I used a stripe Rite polish in white.


Sunday, February 2, 2014

Sally Hansen Complete Salon Manicure Vox Box...

So super lucky me was chosen to receive the Sally Hansen Vox Box from Influenster.  This is a great site that sends you free products to try based on the things you like. And as everyone knows I am a total Polish addict! I received this package free of charge and neither Sally Hansen or Influenster have told me what to say or include in this review. 

You can find Sally Hansen products at most local Drugstores and supercenters and in the beauty aisle of your favorite grocer even! This specific product will run you anywhere from $6-$8. If you love Sally Hansen products as much as I do you can check them out on Facebook, Twitter , Pinterest, You Tube, Instagram, or via their website http://www.sallyhansen.com/.

Sally Hansen Complete Salon Manicure comes comes in 49 different shades so there is something for everyone!! With Glitters, Shimmers, and bold colors this is the perfect go to polish. There are 7 great benefits in this bottle to make it the perfect salon manicure every time!\
  • Base Coat
  • Strengthener
  • Growth Treatment
  • Color
  • Top Coat
  • Chip Resistant
  • Gel Shine
Some other great benefits in my eyes where I loved the bottle shape and design. The brush was easy to grip. And when they say chip resistant they mean it. I wore one of the colors for over a week with very little chipping. These bottle have a large wide brush which I don't usually prefer but something about this one was absolutely perfect! I got beautiful streak free color in just one or 2 strokes of the brush!!

And now for the fabulous colors I received...
So I got Pat On The Black, Red My Lips, & Jaded.
First impression...Great colors and a great variety for any type of girl.

First up is Jaded. Now this is not my usual kinda color as I tend to gravitate to bold and dark colors. It is a Creamy pale blue color with a hint of green that makes me think of seafoam. This color is just perfect for Spring in my mind. This was by far my least favorite of all 3. The polish seemed a bit more translucent and that is just not my style. I also had a tiny bit of trouble with the color dragging but overall the mani came out just fine. I did have to use 3 coats of polish for this.


Next up is Red My Lips. This is just the perfect bombshell red for the perfect pin up moments. It is a true red with no real undertones and I loved it! Only needed 2 coats for full coverage on this one. Also the dry time between coat was pretty fast on all the polishes.


Finally I can show you my absolute favorite! This one is Pat On The Black. Its a super dark grape/wine color that borders on black. Prefect for the little goth girl who needs the tiniest hint of color to complete her look.


Be sure and check out all the amazing Sally Hansen Complete Salon Manicure colors at a drug store near you. I promise you won't be disappointed!


Tuesday, May 28, 2013

Thanks to my wonderful girlfriends I got a couple of pretty new polishes to show off. The first one is Sally Hansen Hard As Nails Xtreme Wear in Deep Purple...
For some reason this color turns out bluer in pics so here is what it looks like in the bottle...
And this one is Sally Hansen Complete Salon manicure in Black & Blue....

Sunday, October 14, 2012

Nail-Aween day 10: Friday the 13th Nails....

Ok so day 10 was any Halloween Inspired Mani and you know I gotta rock out a horror movie. I chose Friday the 13th cause I thought I could do it best.
I used:
OPI Spookettes mini I Only Date Werewolves
Wet N Wild Wild Shine in Red Red
Sally Hansen Xtreme wear in Wet Cement
Miliani Whitest White.
You will also need a nail art brush, Tape, Qtips, Nail Polish remover, Toothpicks, & a glass of water.

Start with 2 coats I only date werewolves on all nails.
Then I used a water marble for the bloody mess nails.
Use the tape to tape around your nail for less mess.
Start with a small glass of water.
Drip in one drop of the Milani Whitest white and let it spread across the water.
Repeat with the Wet N Wild Red Red.
Repeat this process until you finish with a drop in the center.
Use a toothpick to draw the design lightly across the polish...Since I wanted a certain effect I just drew in some vertical lines. Be careful in this step as your don't want to break the polish apart anywhere.
Dip your nail onto the design.
While your nail is still in the water take a toothpick and pull the excess polish off the water surface. It should come up in mostly one big blob.
Then pull you nail out of the water.
Allow the polish to dry. Use a qtip and remover to clean the edges of your nails.
I repeated this process on all my nails except my index finger.

For my accent nail I used a nail art brush and the wet cement polish to draw out the mask shape.
I allowed this to almost dry then pressed it with the tip of my finger to give it a little texture...
I then added the eyes and mouth in I only Date Werewolves...
Followed by the top and cheek lines in the mask in Red Red...
I just love how this all came together. I actually did it for my little bro who loves Jason !

Wednesday, October 10, 2012

Nail-Aween day 9: Pumpkin....

Ok so I like how this day came out ;)
I Used the OPI Spookettes Mini set and Wet N Wild Fast Dry in SaGreena the Teenage Witch.
On my Index finger I used 3 coats of OPI He's My Boo.
The rest of my nails were 2 coats of I Only Date Werewolves.
The Pumpkin face is a cute little waterslide decal that was super easy to use that came with the polish set.
On My ring finger I used the He's My Boo to draw out a pumpkin shape.
Then I used SaGreena The Teenage witch with a Nail Art brush and drew out the stem and vines...

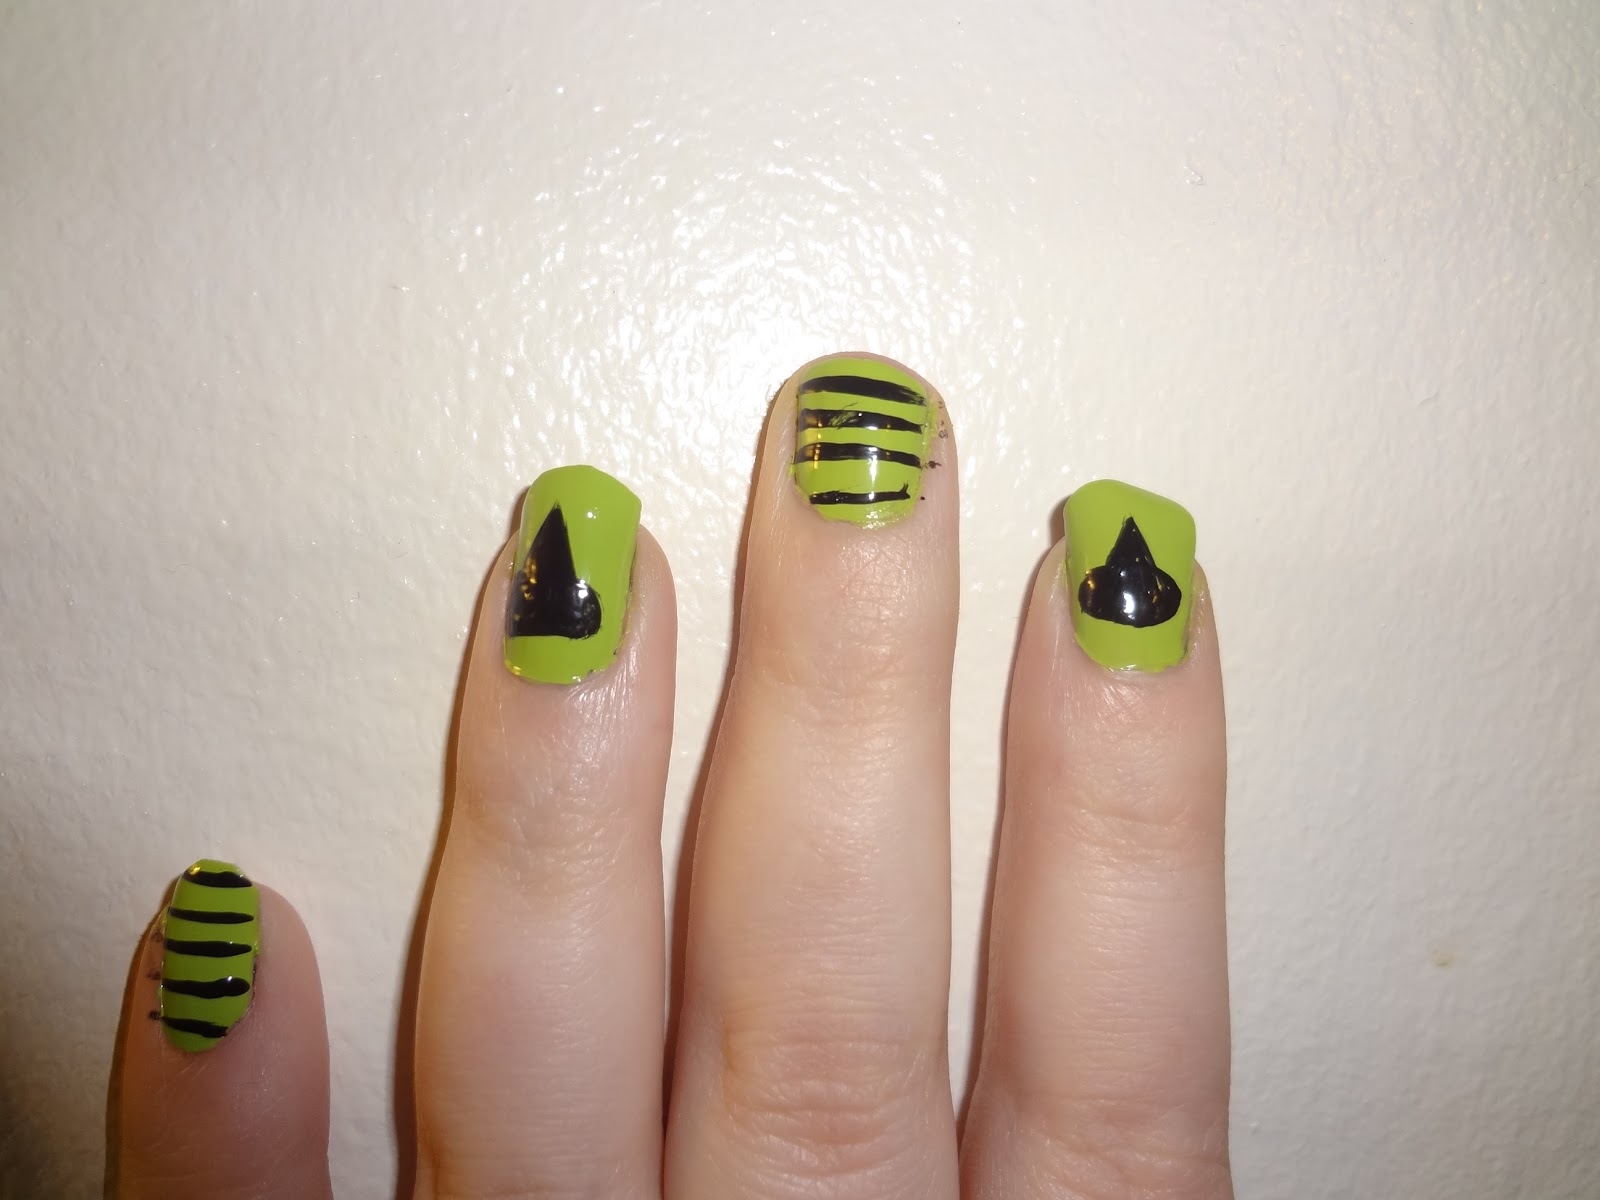
Nail-Aween Day 8: Witchy...

Nice an simple today for the Witch look. I used Sally Hansen Xtreme Wear in Green With Envy and a black nail art pen.
Sorry I didnt clean before taking the pic but I didnt end up wearing this mani cause the green just didnt dry right....

Sunday, September 9, 2012

Sally hansen Salon Effects Nails Strips: Headbanger


For those of you who don't know I love love LOVE nail strips! Having no dry time is just awesome. Anyway I got a TON for these strips in headbanger the other day. It is a full on pink glitter background with black skull & Crossbones print. How freakin awesome is that! They go on super easy and they actually have even less of a smell then the non metallic strips if you can believe it. The only downfall I found was that the metallic seems too peel up more at the edges than the regular strips do. Don't Get me wrong I still wore them for quite awhile before changing them and that says a lot right there. I love the look of strips cause no drying time and I always have a perfect even coat of polish no matter what :)